
Techniques
|
I have never let my schooling interfere with my education. Mark Twain
With good posture and awareness it is difficult for uke to find an opening for attack. This is particularly obvious when practising with a bokken or jo, which one has to lower or retract to the side slightly to let uke in. And even while the technique progresses, uke is still supposed to attack, poking at any suki that appear in tori's technique. Uke too, responds in such a way as to reduce the suki available to tori. In fact, it is said that once all the suki for atemi are closed, all that is left is Aikido technique. The techniques of Aikido offer us the opportunity for us to develop and test our body structure in a coordinated way. The first aim has to be to get all the techniques sorted in your brain - see the chart at the end. Once that is done, you have the basic system. Constant emphasis on the basics is always required. Also, it is interesting to think of a technique as being a solution to a problem (uke's grip). This creates a more analytical approach. Once the techniques have been absorbed, you need to practice lots of kokyu-ho and kokyu-nage and merge the way you do you these with the way you do your techniques. I am guessing few will show you how so ... it is up to you! (a) Discerning differences Rather than 'techniques', I prefer the concept of 'shapes'. This is an attempt to escape from the form. But that is not to suggest that form be avoided - for beginners it is essential. For beginners the form is a necessary introduction to any martial art, no less so in Aikido. With a little experience under one's belt, good basics, good ukemi, a few gradings, and a lot of kokyu-nage, one will have become quite familiar with the basic patterns of Aikido. The emphasis here is on 'patterns'. Now, it will become helpful to regard the techniques as shapes. Thus we have ikkyo shape, nikyo shape, or kaiten-nage shape. This is to help one come to terms with the vast number of variations that exist. Aikidoka, perhaps more than most other martial artists, often hold courses where a mixture of styles meet. Often, they frequent other dojos on friendly visits. It is while participating in these kinds of activities that confusion can set in for the unwary. What results is a classification of styles, or dojos - we do it this way, they do it that, another dojo does it another, apparently creating different sets of what is essentially the same knowledge. The key to learning Aikido is to look for the commonalties, not the differences, since it is only in the common principles where solid foundations lie. At first, it is not easy to spot common principles as they are not always so obvious to the uninitiated; one needs a discerning eye. And even amongst the differences one may find other hidden principles just waiting to be grasped. For example, a difference at another school might indeed be a very good principle that one's own school lacks. It is also the case that some of these differences are bad. But one must be careful - it may be that the problem lies in one's own method, not theirs. Honest retrospection is the key through which the answers will emerge. There are many ikkyo shapes. If one can make a particular ikkyo shape work, it makes sense to adopt it in one's repertoire. If one can not make it work, but others can, then the problem obviously lies in the self. Suspect the technique last. More often than not, the differences between variations seem just mechanical. A different foot is forward or a different entry is used. However, if one had just a mechanistic view of the techniques there would be no end to the number of variations to remember. And this is the way many people train. That different entry is not a mechanical difference but represents a new principle that could be applied elsewhere, in other 'shapes'. By thinking about it and trying to make that new entry fit into another 'shape', one will automatically assign it as a useful principle. One need not remember that particular ikkyo variation, just remember the new principle so that it helps to create one's own new personal variations. Of course, they will not really be new, nor one's own, as others have already discovered them a thousand times before, but there is nothing better than to discover, to feel in control of one's learning experience, and not be completely dependent upon a teacher. This is where the voyage of real discovery begins and may explain what is meant by the assertion - the Shodan is just a beginner. The Shodan has the tools and should have all the pieces, so now must set to work putting them together and figuring out what it all means. But there is no need to wait until Shodan to begin: When meeting in vigorous practice one has little time to think. What happens is, one meets uke, recognises a shape such as ikkyo or kaiten-nage, and takes it. One way to practice this is for uke and tori to run and clash into each other, gently-ish. At the moment of random clash, both pause, tori looks at uke and examines the situation trying to recognise a shape. Once tori recognises something, it is used and technique materialises. After one has a grasp of what principles are and can collect and apply them to one's own aiki, then, and only then, will one be able to look at what others are doing and say with certainty that, "That is correct," or, "That is wrong." In the long run, it will help distinguish sound technique from bad variation. Many times I have seen people criticise good form. It may not be good form in a certain school, but it is good form nevertheless, which indicates that they do not know. Naturally perhaps, it is the tradition in martial arts that when visiting other schools one does it their way; the purpose in visiting another school is to learn new ways, not show your own. Certainly, when visiting other schools the wise look for new principles, not new form.
(b) Technical tips The following are not descriptions of how to do the techniques, rather the assumption is that one already knows the basic ‘shapes’, thus what follows are added tips on how to do them with different flavours. All descriptions are from the point of view of tori in right posture, unless otherwise stated.
|
 |
 |
|
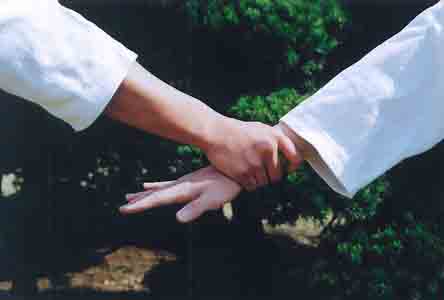
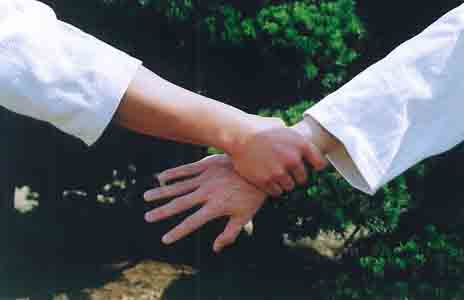
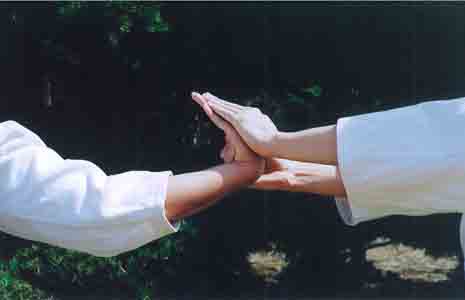
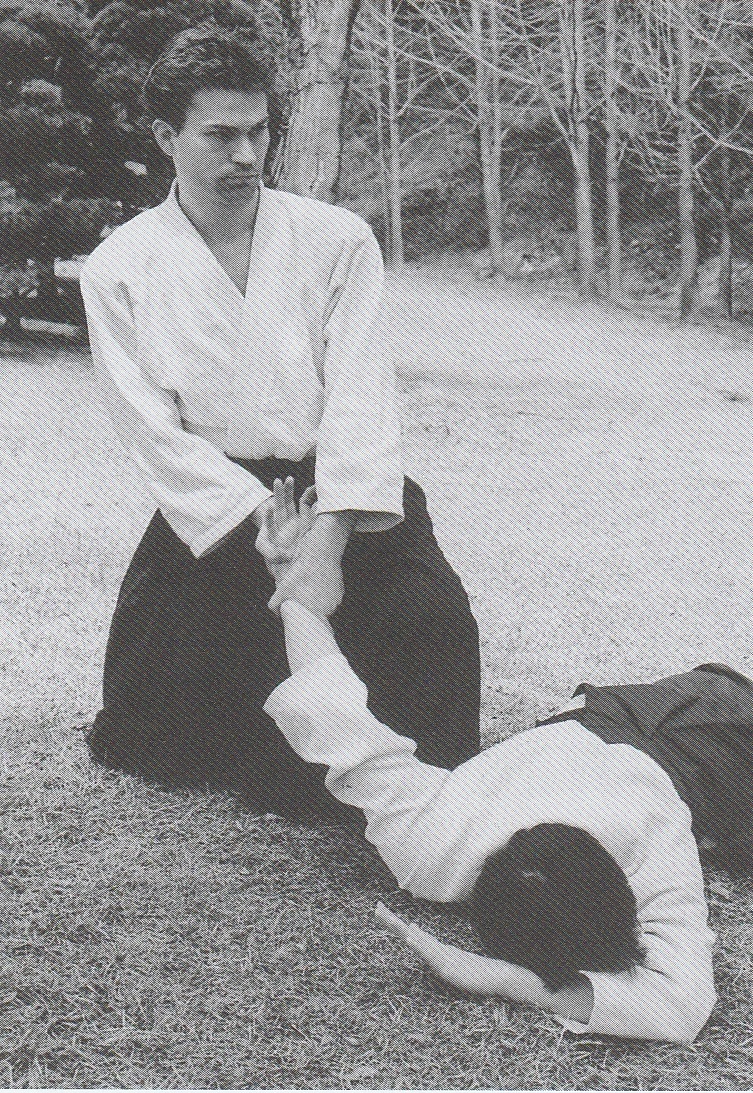
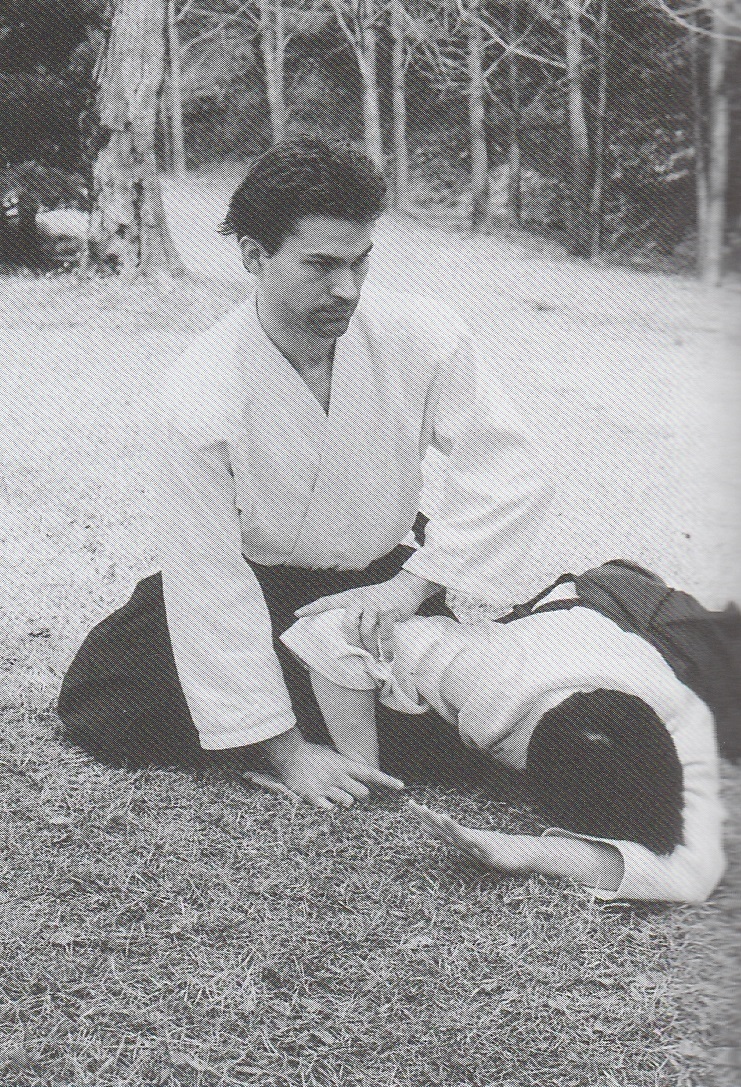
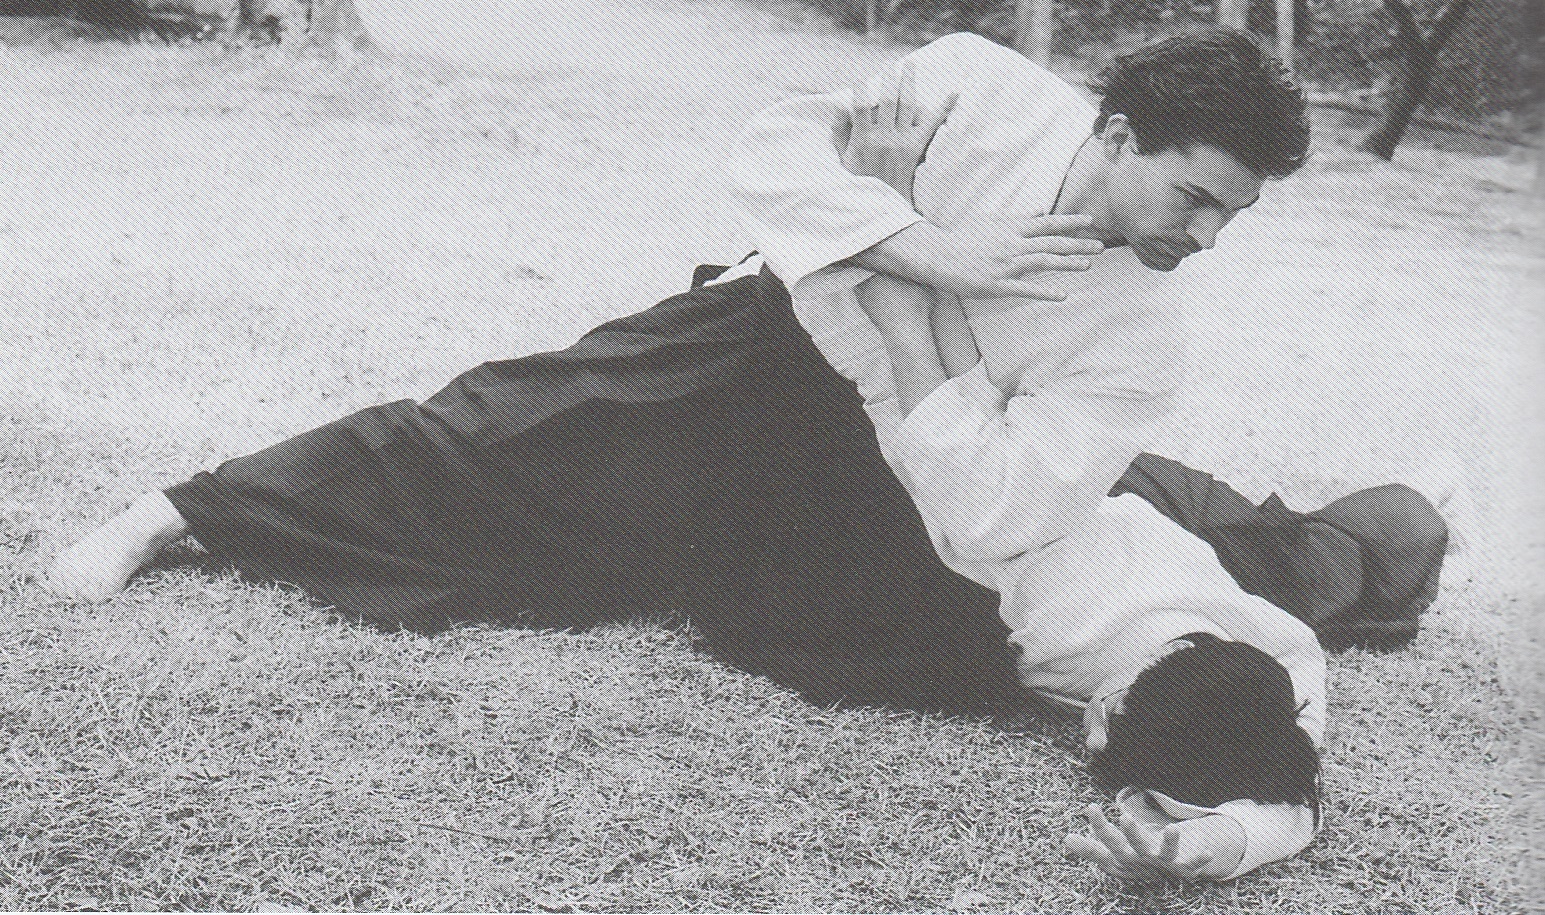
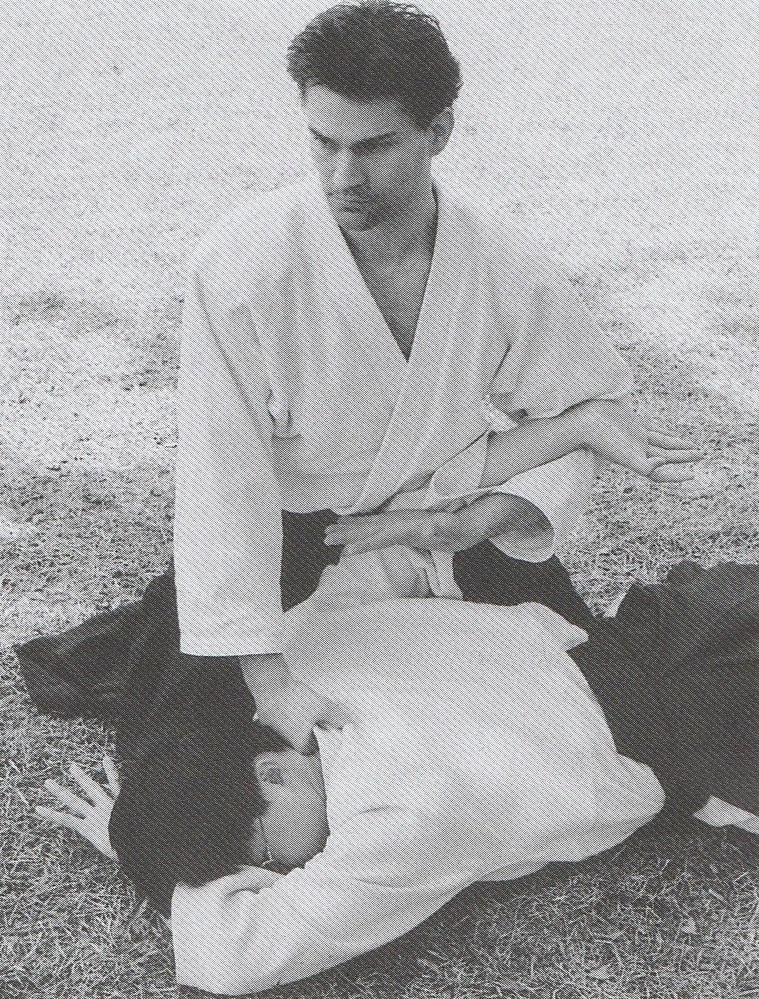
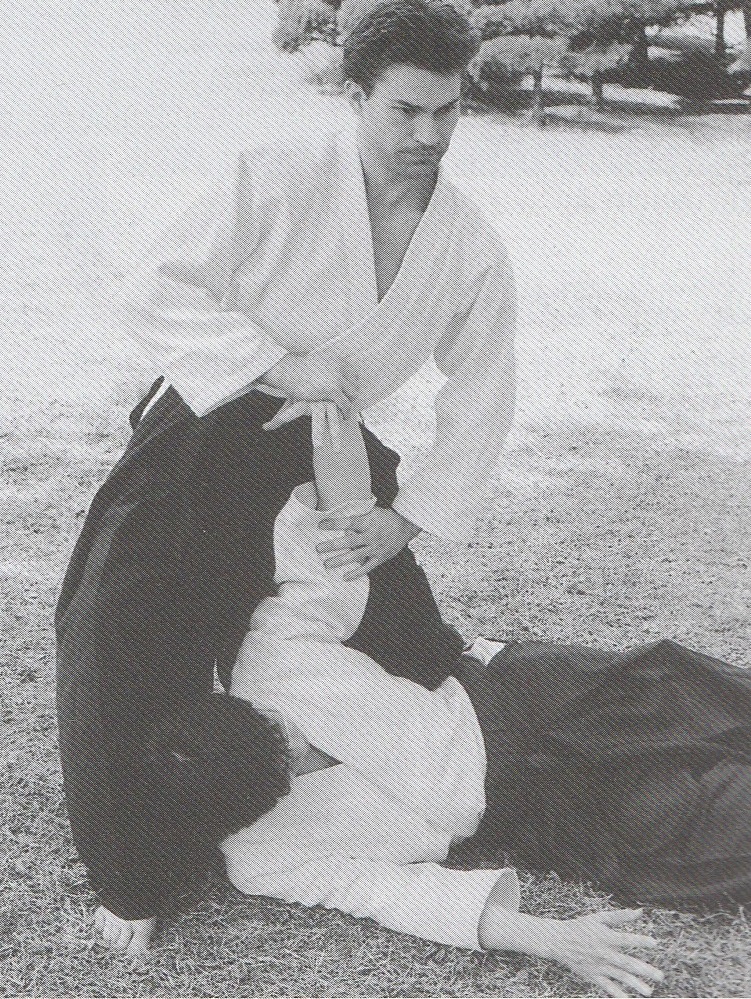
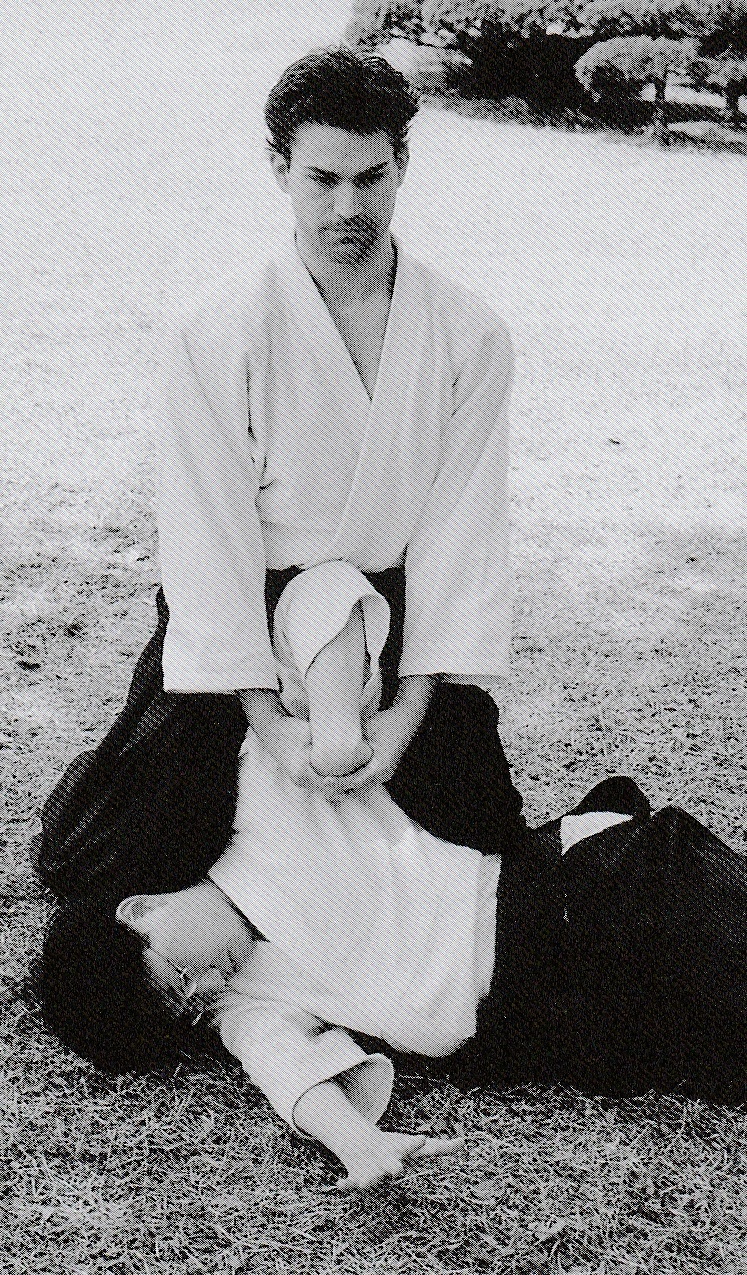
| Ikkyo-irimi shape | Ikkyo-irimi midway |
| (c) Ikkyo is useful as it is the simplest of the immobilisation techniques in the sense that tori grabs uke’s arm and presses uke down to the floor. The tricky part is getting one’s co-ordination right while being in the right place at the right time. Imagine the moment when uke takes tori’s arm. In terms of co-ordination, the key is for tori first to determine how uke grabs. |
 |
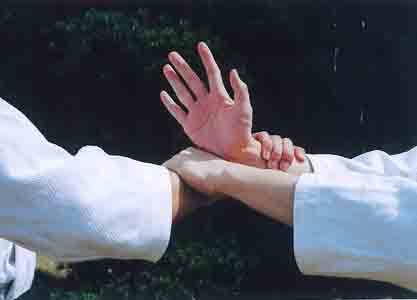
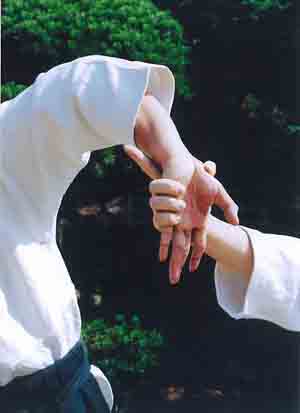
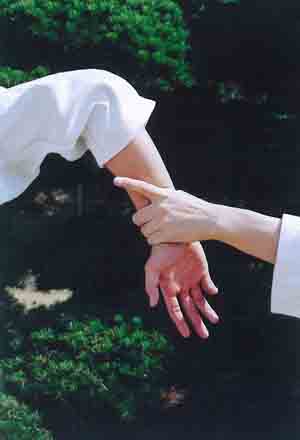
As has been explained, there are four main arm positions, palm-up, thumb-up, palm-down, and thumb-down. It would certainly be wise to practice being grabbed from all four positions as in each case, the technique will start, and unfold, differently. Also, tori could offer palm-up, or whatever, yet turn the arm to one of the remaining three positions just as uke takes hold. Naturally perhaps, one of the biggest problems beginners have is failing to determine the initial position of teacher’s wrist / arm and how it changes; such is true for all other hand grabbing attacks. In terms of space, when attacked tori needs to adjust their position rearwards slightly, or more, so that uke can either, grab strongly, lightly, or barely grasp at all. Obviously, the further back one goes, the weaker uke’s grab will be and the easier it will be for tori to start. It is also useful to avoid slightly to the left, or to the right while moving back, both of which modify the technique differently. Think of the 8 directions in 3 planes and you can almost move anywhere. For an ai-hanmi katate-dori attack, avoiding to the rear left will leave one on the outside of uke’s arms, avoiding to the rear right will take one to the inside, avoiding straight back will leave one central. All are viable and can be further modified by time, the feeling of entering early, at the same time, or late. One can begin technique at different times yet still maintain a sense of harmony with uke. If tegatanas meet as in shomen-uchi, try winding the bobbin (see the Power section). Here, you meet, and deflect uke's strike/hand slightly to take balance and then as he falls you take the elbow. If you train this, it will develop into a powerful motion that uke has no control over - it controls his energy/reaction. One interesting variation - ai-hanmi katate-dori - where uke drops his elbow to mess with your technique - is for tori to not grasp uke's elbow at all, but instead to place their lower wrist area on uke's upper arm , and then to rotate it palm-down while thrusting the ulna bone forwards into the humourus bone slightly - it hits a nerve on most people - if you get the right place. This will roll uke over sending them to the ground , but be careful, do not do it too hard - it is their turn next! Then, follow up with ikkyo. An uncommon, but very powerful, variation of ikkyo is for tori to catch uke's arm from underneath, just above uke's elbow with the palm-up. This grip sometimes happens naturally, such as when uke misbehaves bending their elbow downwards to resist ikkyo. This allows tori the option of a strong jerk to disorient uke, after which the opportunity to re-enter ikkyo might be created, otherwise a follow-up technique, such as irimi-nage, could be attempted. Or continue with ikkyo with the elbow hand the opposite way around. Other good variations are to enter one's hips under uke's arm and project, or to trip by blocking uke’s closest leg with one’s own, or to modify using koshi-nage. All of the above ideas can be called principles, and with a little thought, can be applied in many other techniques.
|
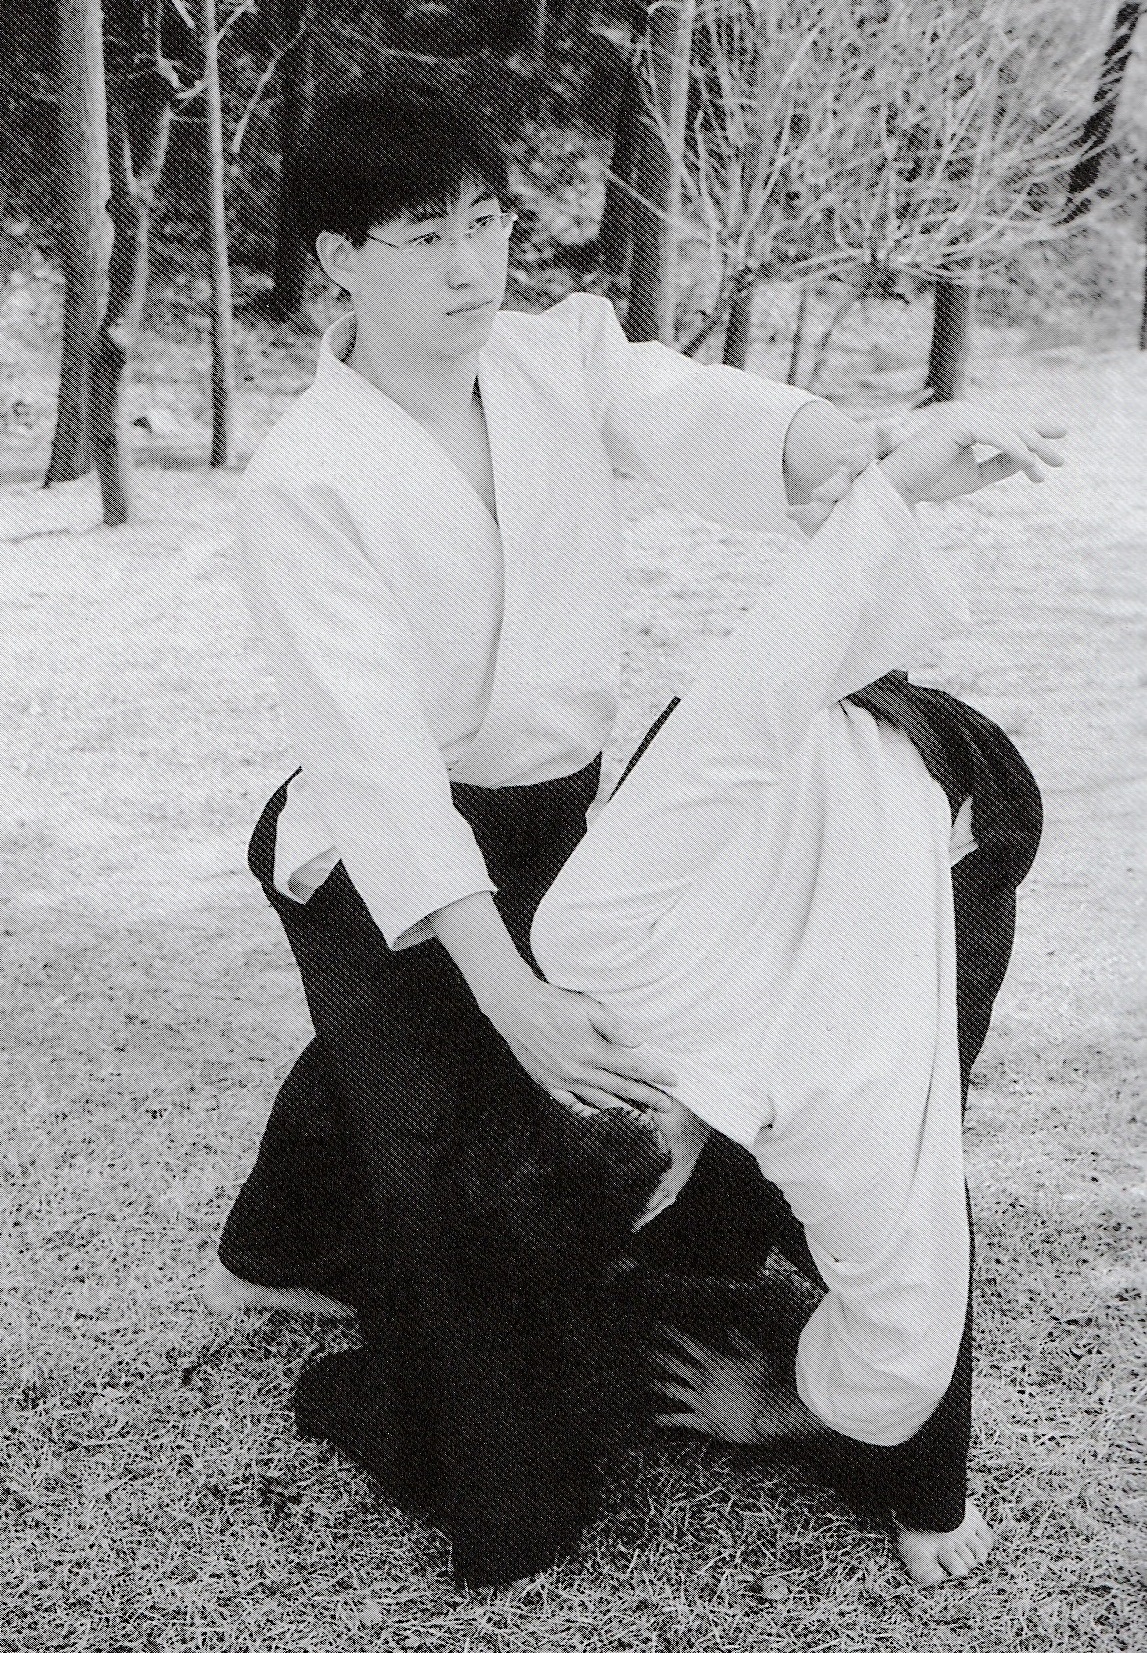
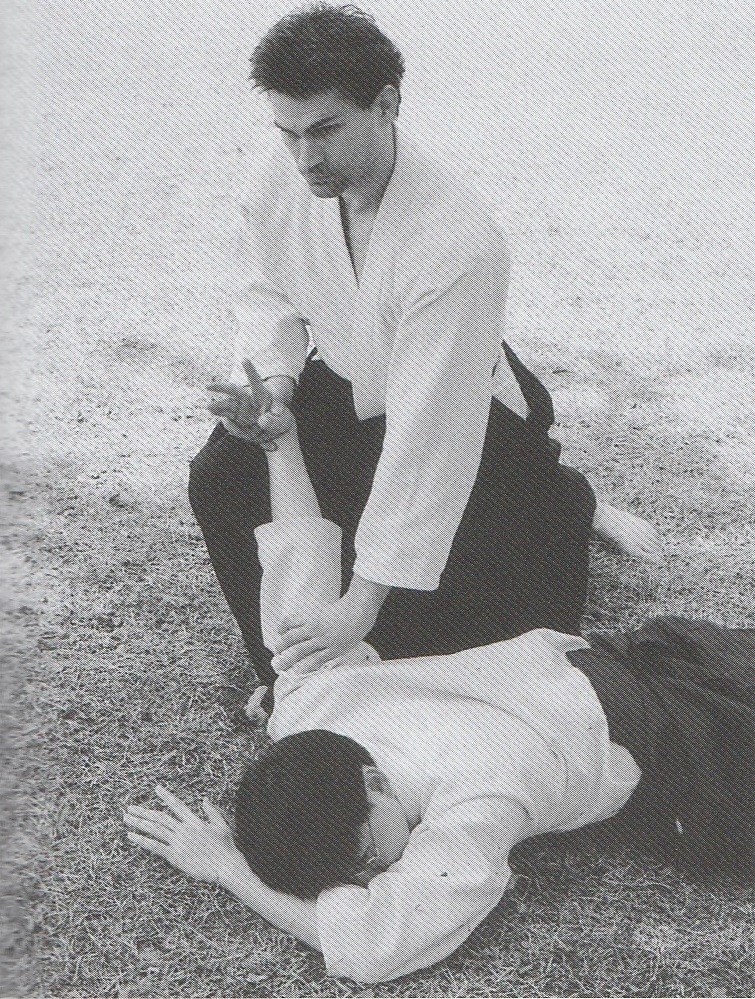
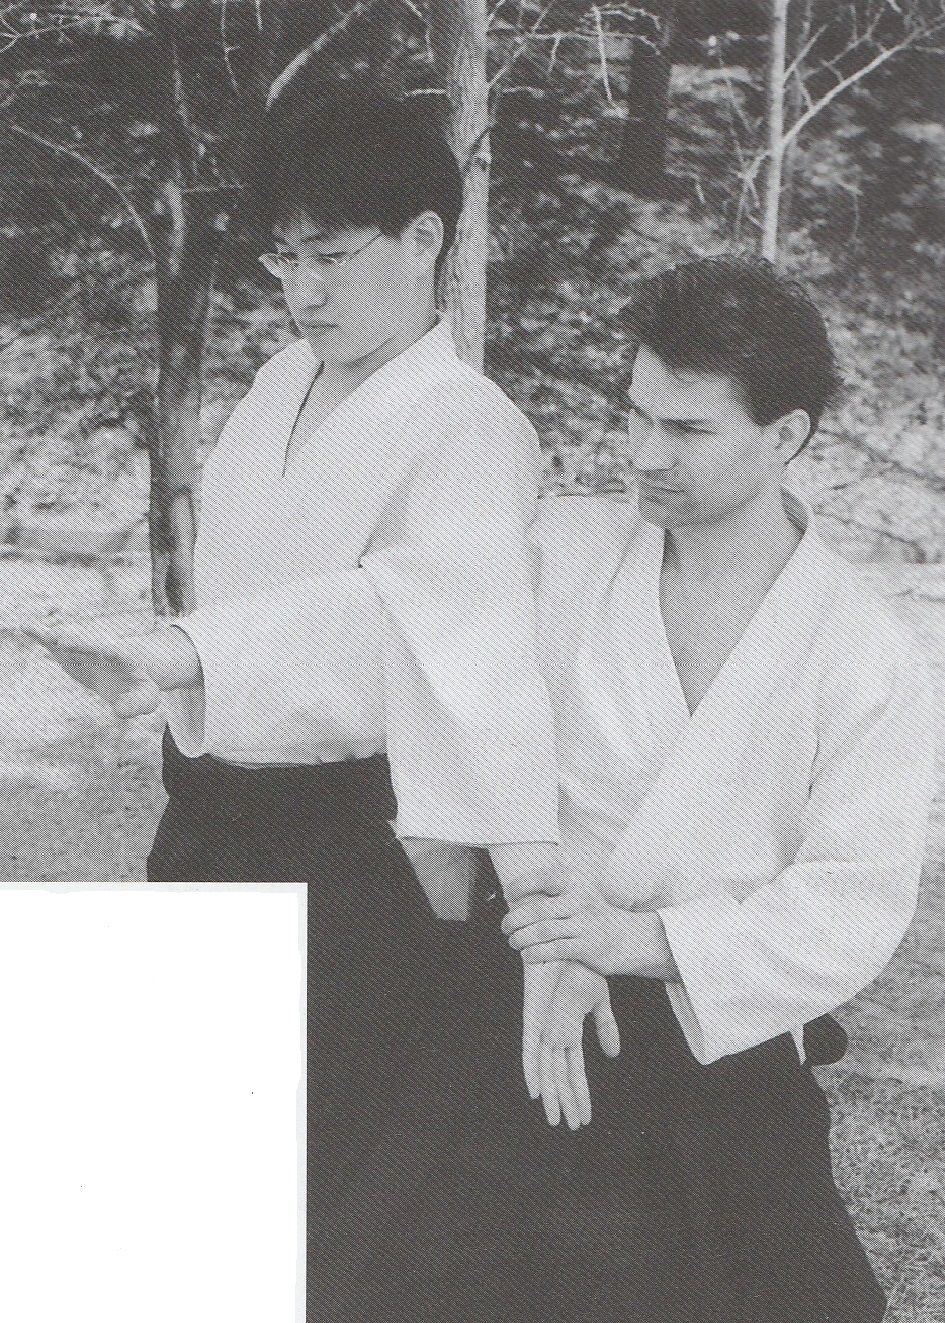
| Start palm up, try ikkyo | |
 |
|
| Start thumb up, try ikkyo | |
 |
|
| Start palm down, try ikkyo | |
 |
|
| Start thumb down, try ikkyo |
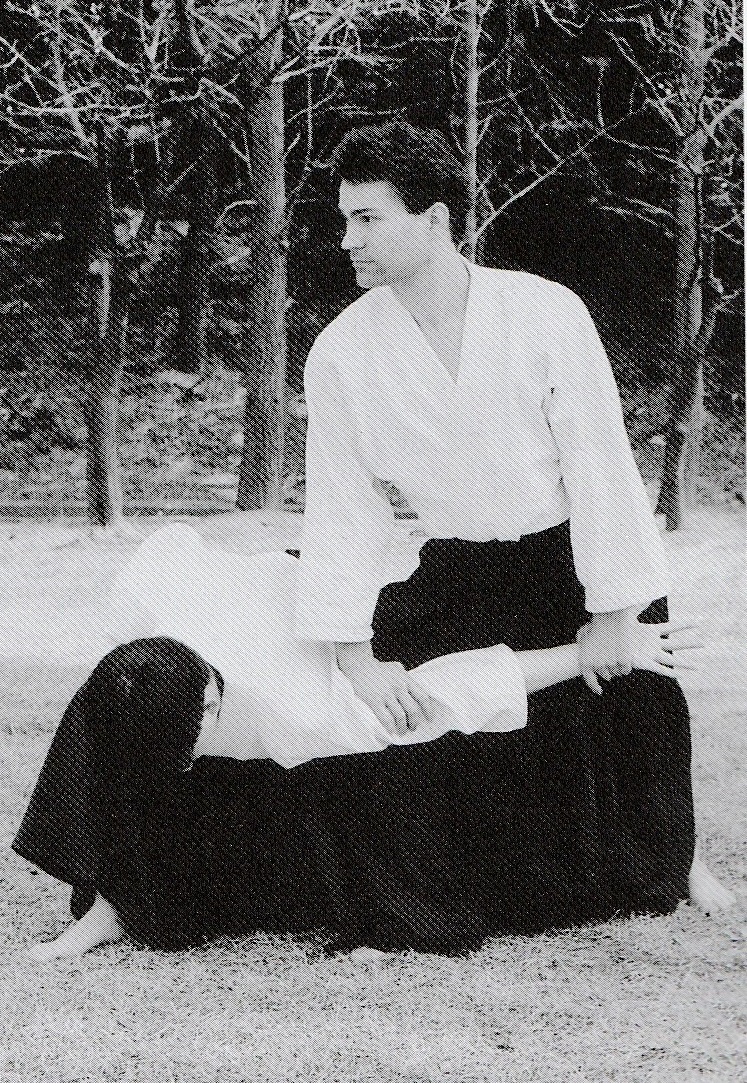
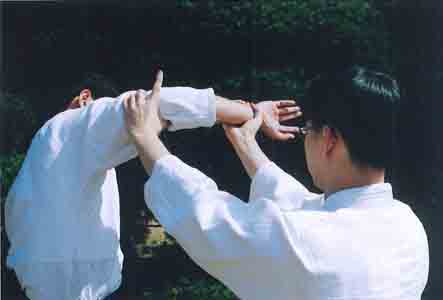
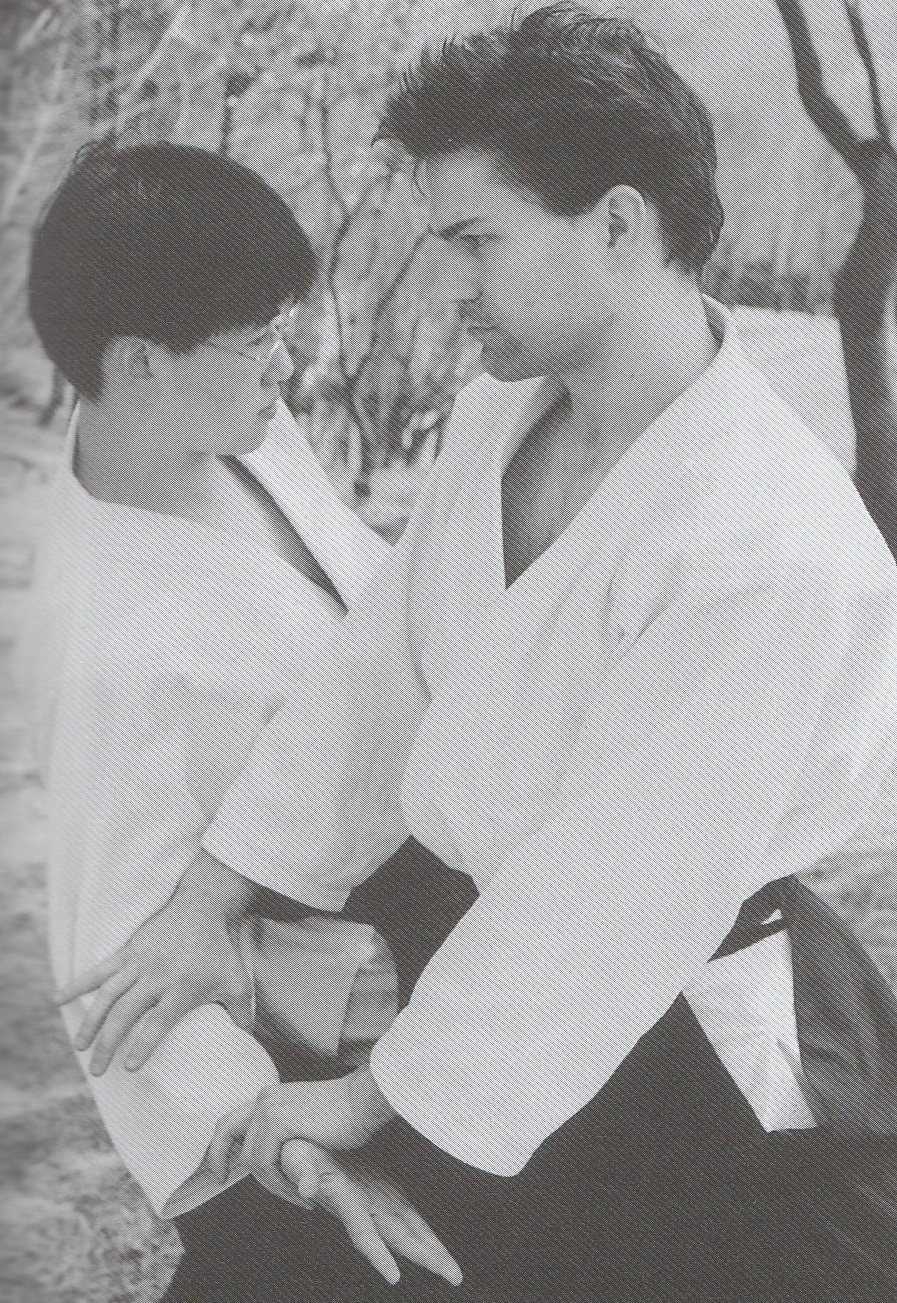
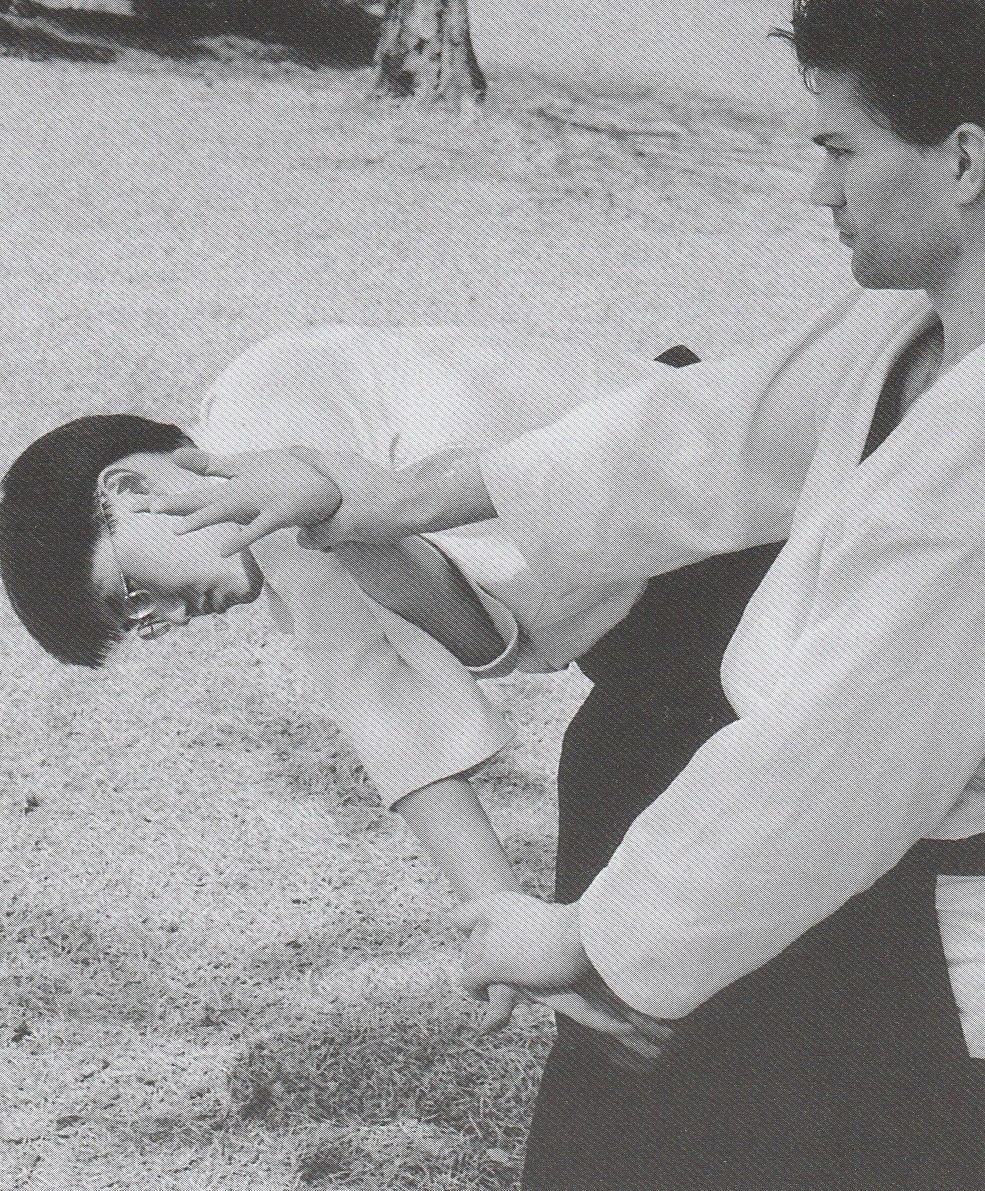
| (d) Nikyo can be done in much the same way as ikkyo explained above. When holding uke in nikyo, make sure that their hand and thumb are grasped firmly, and that one moves from one's own centre to apply the technique. The more uke's elbow bends towards ninety degrees, the easier it is to apply pain to the wrist. It is also important for tori to show control - tori's slight movement applies technique that provokes a much larger movement in uke. |
 |
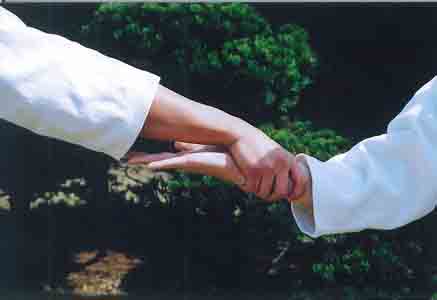
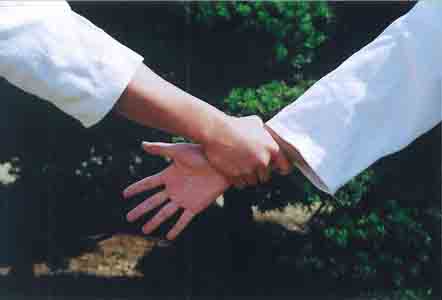
 Non-standard nikyo release |
| Standard Nikyo shape |
|
There are several common variations of holding. In nikyo, some wring the wrist and hand as in wringing water out of a wet flannel. Some concentrate on the up and down motion of uke’s hand and cut down uke's centre through the pain in their hand; some think of nikyo as a kind of reverse sankyo screwing the hand in towards uke's face making them scurry around to the rear; some take their free left hand over uke's arm so completely that their own elbow passes that of uke's; some take it further over and under latching onto their own right hand for extra leverage; some take their free left arm under uke's arm and push against uke’s elbow from the inside; some modify the latter variation pushing their hand under uke's arm and up taking uke's hand an even more powerful wrist lock; some take uke's wrist and press it into their chest then push forwards to make technique; some even put uke's wrist on their foreheads and make a small nod or bow to apply pain; and some press uke's wrist and elbow together. Nikyo can also be combined with koshi-nage. It can be done in much the same way as ikkyo koshi-nage projection, or, one can use the pain to push uke's elbow up high like sankyo thereby drawing uke closer, then throwing straight down with koshi-nage. No matter what nikyo variant tori does, however, from uke's point of view it ought be pretty much the same kind of pain. An important point to note is that when applying the wrist lock, one can either push uke away slightly, or draw them nearer. Obviously, push them away for an irimi entrance, draw them nearer for tenkan. Confusing the two leads to an untidy technique
|
 (e) Sankyo is a reversal of the nikyo wrist position. While it is standard to take uke down while walking backwards, one simple and effective variation is to perform a standard ikkyo while grabbing the fingers, instead of the wrist, to make a sankyo bowed-arm shape. Finish by increasing the pressure of the twist while still behind uke’s arm in the apparent ikkyo-like position. Another similar variation is to take uke down as before but then switch hands, remaining behind the bowed-arm with one’s own hands reversed, again finishing by increasing the pressure. Sankyo is a powerful technique and it is easy for tori to get used to the idea of leading uke around by the point of their elbow. The pain is in the wrist but the secret lies in the elbow. This kind of idea is useful in other techniques, especially yonkyo. Interestingly, one can drop uke's elbow by pointing it at the floor to the front or rear; to the front results in an ordinary finish, to the rear, uke may be flipped over or thrown down like the proverbial sack of potatoes. Nikyo can be done in like manner, which becomes a kind of kote-gaeshi variant, as can ikkyo, which then turns into ude garami-nage. |
|
(f) Yonkyo
is one of the most difficult techniques. In essence the general movement is much
the same as sankyo, but inflicting pain on uke's inner wrist is
the main problem; on some people it is easy, on others, nigh on impossible. In
order to learn it better it is best to isolate the yonkyo grip from the
rest of the technique. Simply, grab one's partner's palm-up wrist and practice
pressing down on it with the inner knuckle of the forefinger. The weakest and
therefore the target points are the corners of the inner wrist, although it can
sometimes be seen done on the outside corners on the back of the wrist. Also,
the closer to the hand, the easier it is to generate the pain. Just pressing is
not enough. It feels as though one is collecting a bunch of nerves in the
knuckle and then manipulating them slightly over a bone, then pressing. If it
seems like a certain person is immune, hold a pen or stick in the palm and press
the flat side (not the point) of it into their wrist like yonkyo. This
also works quite well on the bony back of the hand too and at least, ought to
show that yonkyo is possible on most people.
|
 |
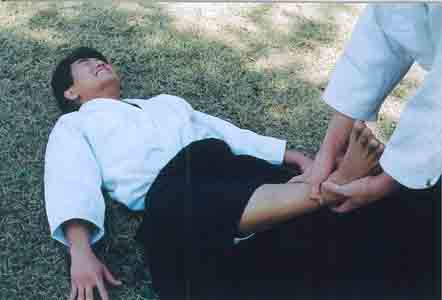
Yonkyo is a useful holding grip in many techniques. In ikkyo, holding with a yonkyo grip in both hands prevents one from using too much strength, and might even cause a little yonkyo pain in the wrist if performed well. When performing nikyo and sankyo it is likewise possible to include a modicum of yonkyo pain at the same time as part of the technique. In shiho-nage, applying yonkyo pressure to uke's wrist can sometimes help but if too painful, shiho-nage itself might become impossible as uke collapses in a heap. Holding a bokken or jo using a yonkyo grip helps give a clue to direction in movement. Of course it follows that in applying yonkyo more universally, one's own yonkyo power will improve. Finally, when you catch your partner's wrist as in katate-dori - think of and use yonkyo. Thus, they have to learn to counter this grip while at the same time you are learning to develop it. Yonkyo also works on the ankle.
|
| (g) Gokyo is the same as ikkyo but with the wrist-grabbing hand reversed. It is often taught as a response to a knife attack as gripping in this way ensures the blade is a little further from one's own wrist. Accordingly, it is most often performed against knife attacks but it ought to credit more favour than that. From the outside of uke's arms, ikkyo is the usual response, but gokyo is also possible. From the inside, especially from yokomen-uchi, while we all do ikkyo without question in daily practice, logic dictates that gokyo be far more suitable since it is so easy to catch uke's wrist with gokyo to strongly take control. |
 |
|
With ordinary ikkyo, we cannot easily lift uke's hand, instead having to wait for uke to do so of their own accord, then taking advantage. Simply, if gokyo is good enough for knife defences, it ought to be good enough for empty hand attacks too. Indeed, on grabbing uke's (right) wrist from the inside, by necessity, tori's (right) hand is palm-down. By turning the body (to the right) and twisting their own arm to a palm-up position, tori can generate a lot of power, should that be required. Accordingly, it makes sense to practice gokyo from katate-dori or ryote-dori attacks as well. When practising gokyo from sode-dori or mune-dori attacks it is essential to break the cloth grip first. If uke offers a resisting straight arm, gokyo can work as an armlock takedown. To enter, tori reverse twists uke’s arm contrary to the ikkyo roll, twisting wrist and elbow in reverse as though wringing a towel. At this time, it is useful to push along uke’s arm to press their shoulder down to the floor. If done this way, gokyo becomes related to ude-gatame, and change is possible to waki-gatame if necessary. |
|
 (h) Rokkyo, otherwise known as waki-gatame, not to be confused with ude-gatame, is the technique that can be used when all other immobilisation's fail. With uke's arm held locked-out against one's chest in a little-finger-up shape, it is quite similar to nikyo. Indeed, should uke succeed in struggling to bend their arm at the elbow, nikyo is the result, yet a side elbow lock can be incorporated at the same time, if desired. And should uke force their arm straight from nikyo, then rokkyo is the result - they are perfect cousins. This technique needs to be practised against every form of attack. The main problem with this technique is that it is an arm-lock and as such, some schools disregard it as they consider arm-locks to be anti-Aikido. Sometimes, philosophy reigns over common sense. |
|
(i) Ude-gatame, sometimes called ude-hishige, differs from waki-gatame in that here, uke's palm faces upwards and as a result, the elbow is pressed straight down. Rather crude when compared to waki-gatame, it can be quite effective. It forms the same kind of elbow pressure that is used when projecting in mae-otoshi or juji-nage and can also be used within other techniques to send uke flying down towards the tatami for an ikkyo immobilisation.
|
 |
|
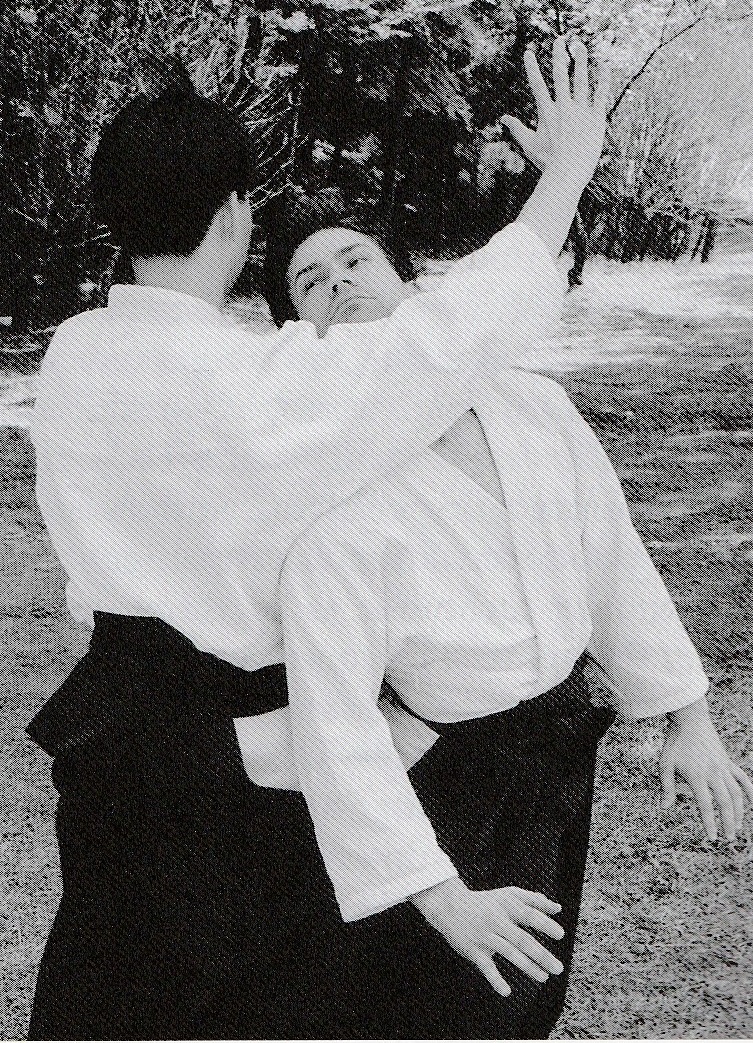 |
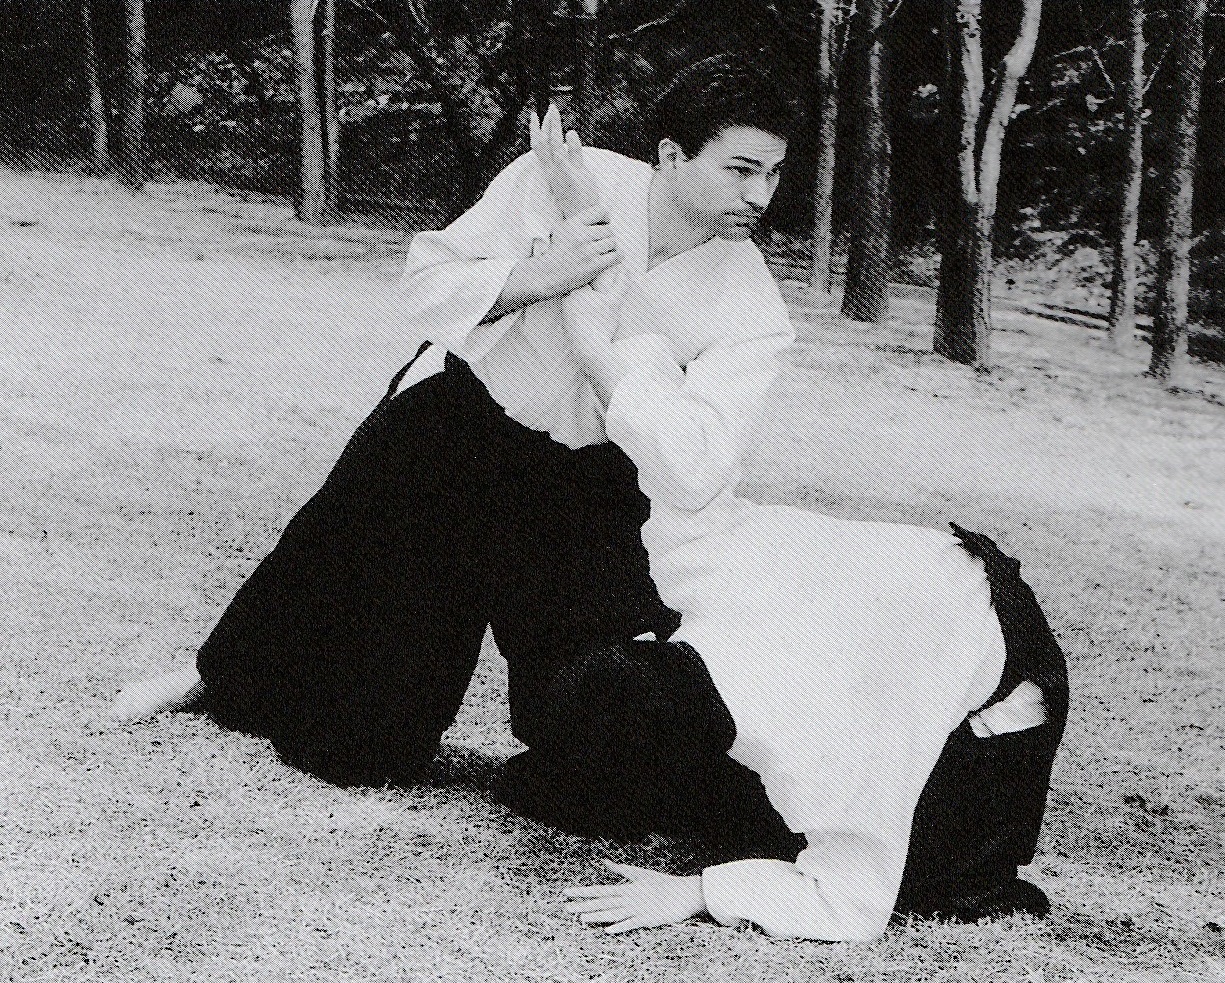
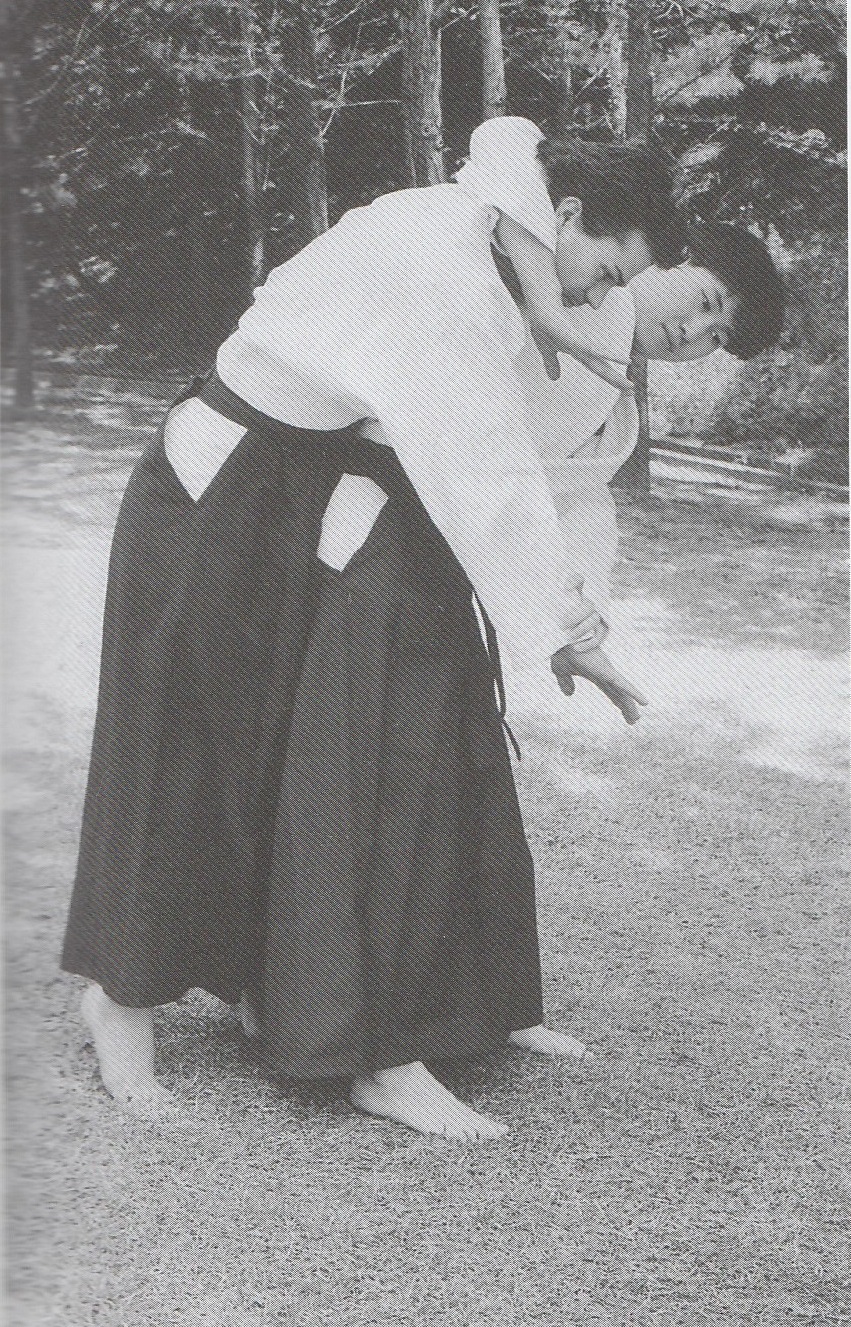
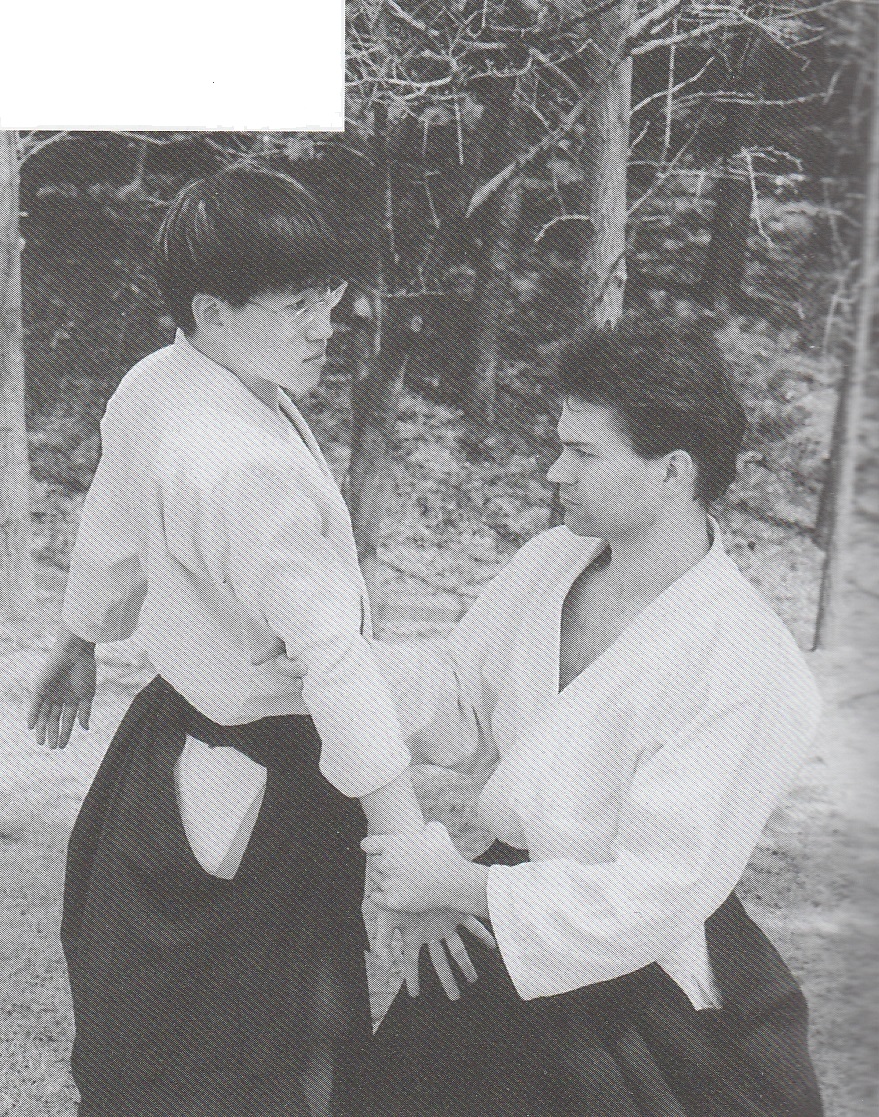
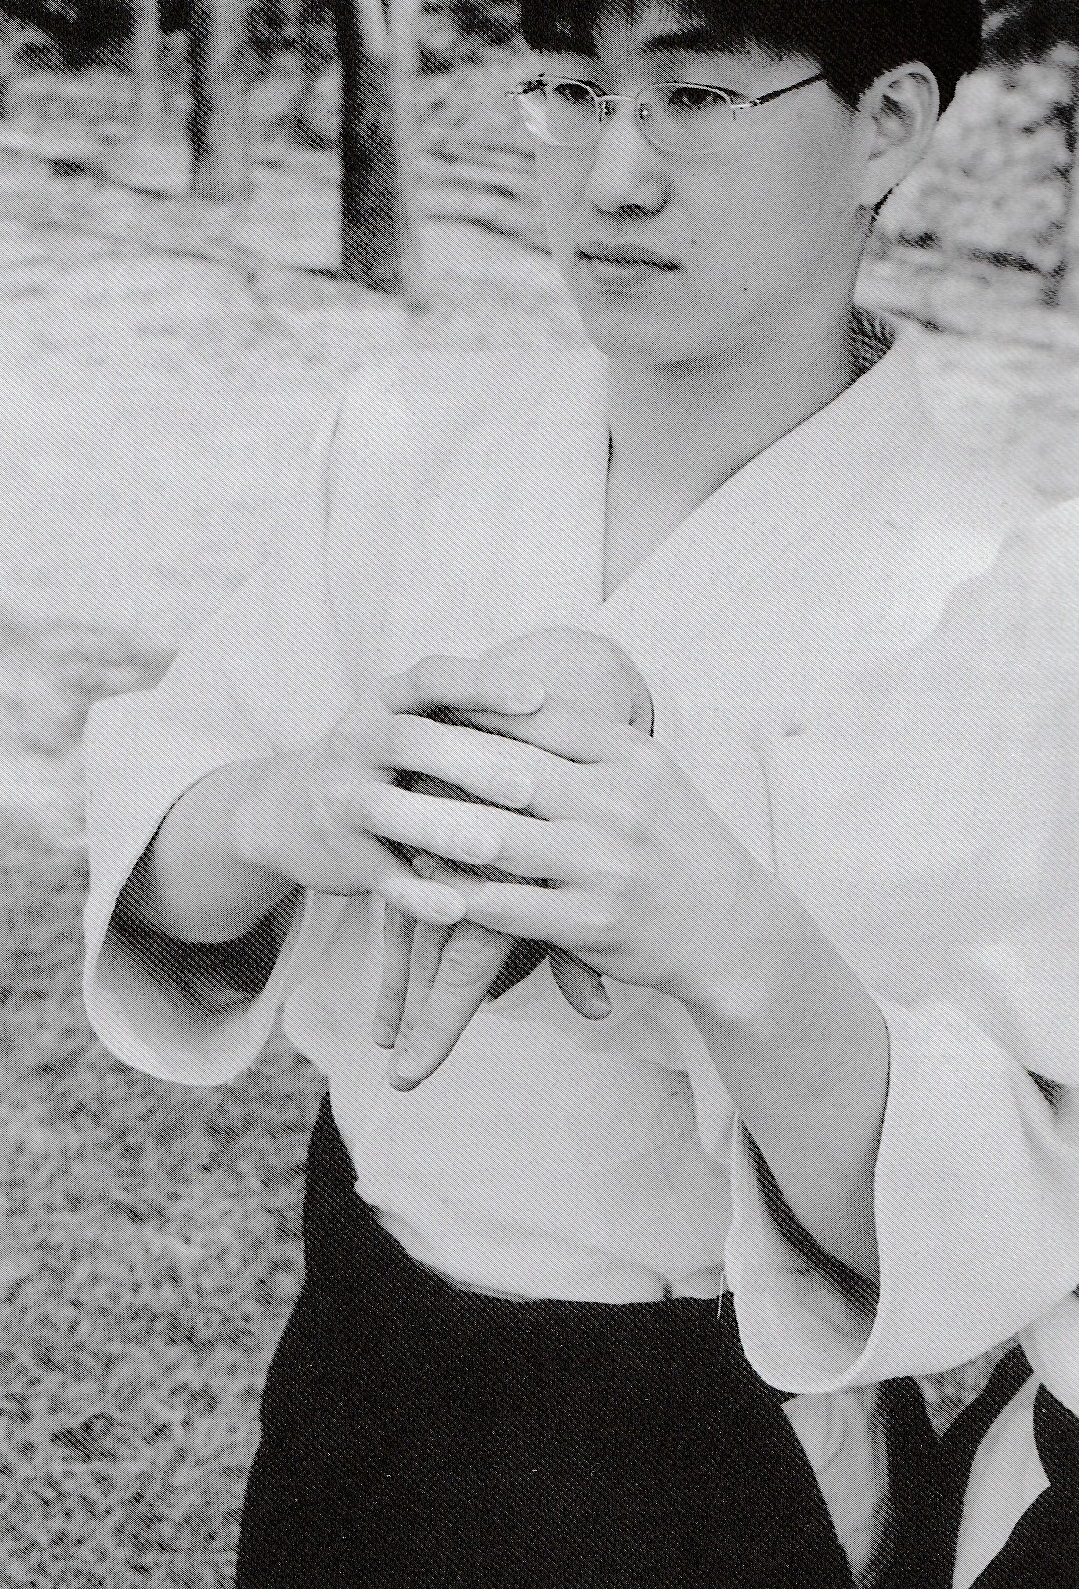
(j) Irimi-nage is one of the most basic of Aikido throws and in a sense, mirrors kaiten-nage in shape in that if uke refuses to get up or be thrown back, one can switch to kaiten-nage, and vice-versa. It is, perhaps, one of the easiest techniques to come to terms with and the first throw that needs to be mastered. One interesting observation is that while many schools practice irimi and tenkan variants for every technique four times before changing roles, they almost always do four tenkan versions of irimi-nage, ignoring the irimi. The irimi-nage irimi version (without the initial tenkan movement) is of great practical importance, especially in terms of self-defence and it makes no sense to ignore it. Standard technique is to throw gently along the spine. The most common variation is to displace uke’s hips to the right with one’s own while taking uke’s head slightly to the left. Sometimes frowned upon as being un-aiki in that it is uncomfortable for uke to break-fall, this is a very practical variation. To be fair, one should only practice the same variation as one’s partner.
|
|
| Irimi-nage | Irimi-nage variation | |
| Other variations include throwing uke over one's hips to the front or rear, throwing uke with the hand on the chin or side of the neck, throwing uke by feigning a strike to the face, which uke avoids by break-falling, and throwing uke by actually striking the side of the neck, albeit gently, of course. The highest skill in throwing with irimi-nage is derived from throwing them up, not down. What goes up, comes down naturally. Here it has become more like tenchi-nage, which shows how some techniques can merge into each other. |
 |
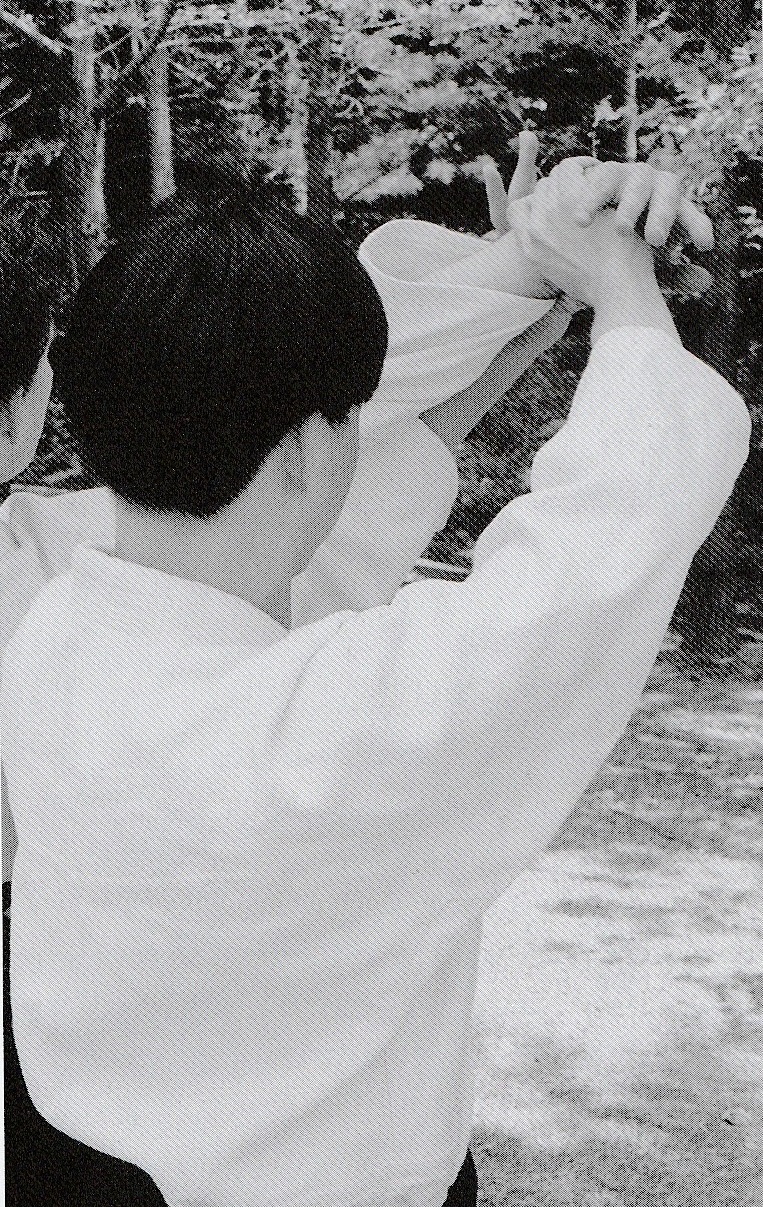
| Shiho-nage tenkan | ||
 |
(k) Shiho-nage, almost impossible to do, is the most classic Aikido technique. No doubt the vast number of variations reflect people's struggle to come to terms with it. But strangely, even though one is highly unlikely to beat off five demented muggers with it, practising shiho-nage offers many valuable lessons in feeling and movement that can be used in other waza. For example, it is most likely through this technique that one first begins to realise the importance of contact and centre.
|
|
|
For an effective shiho-nage one must first come to terms with what different people call mae-otoshi, jujigatame-nage, ude hishigi-nage, or ude kime-nage. This technique, what I call ude kime-nage, is similar to the beginning of shiho-nage but instead tori extends uke's arm out in a twisted semi-armlock and projects uke away. There are many soft and fluffy versions of shiho-nage out there, but the key to a truly powerful shiho-nage lies in having a powerful ude kime-nage. The way one performs ude kime-nage should determine the entrance for shiho-nage; if one can hold uke in the junction position just before the ude kime-nage throw, then one can convert it to shiho-nage without much ado. Failing to unify such common principles indicates that one does not understand.
|
 |
|
| Shiho-nage tenkan – tori’s eye view |
|
|
 (l) Kote-gaeshi is probably one of the most practical Aikido techniques. In shape, it is opposite to nikyo or sankyo, and similar to shiho-nage. Kote-gaeshi is one of the furthest Aikido techniques, furthest in the sense of distance from uke when throwing. The key to getting kote-gaeshi correct is to press uke's wrist in line with uke's fingers, towards an imaginary point just outside their elbow, yet with the feeling of screwing inwards toward their centre along their forearm. Twisting it outwards any more is going to hurt; it might make it work, but does not help in learning Aikido. Pressing towards the elbow allows one to maintain the feeling that one is contacting and disturbing uke's centre. Uke can fall back, or be led over their own wrist forwards. Dropping one's body weight adds a little momentum to the occasion. Further, rather than simply returning uke's hand towards uke's body, one should press or curl the wrist seemingly on the spot, thereby drawing uke forward towards and over their own wrist. Kote-gaeshi is very powerful and after uke's balance is disturbed, many other techniques are possible in combination. If combining kote-gaeshi with another technique such as shomen-ate or irimi-nage it is necessary to modify the kote-gaeshi grip slightly to get a better one-hand hold. To do this, allow the gripping left hand to slip slightly in the direction of the applied pressure until one’s thumb just sneaks around to the back uke’s hand, all the while maintaining control of uke’s thumb. A yonkyo type pressure from your own pointing-finger knuckle can also be applied to the back of uke’s knuckles. A common mistake in kote-gaeshi is where the fingers of tori’s (left) lower hand extend onto uke’s wrist thereby effectively blocking the application of their own technique – the lower hand should hold uke’s hand, not their wrist. |
 |
(m) Kaiten-nage is almost ignored in some Aikido styles, which is strange considering it is such a great compliment to irimi-nage, or tenchi-nage. Once in position to throw, the most common method is to push uke's arm across their back. What is often missed is pressing down the head firmly using the arch of the extended hand. Before placing the hand on the back of the head it is useful to perform a strike, stopping at the last inch for safety, then press. A gentle push produces the standard roll. Done quickly uke will spin on the spot, landing on their backside. Done slowly, one can twist uke so that they feel like they are twisting out of it, but end up sitting down, quite open to a range of holds, locks, or strangles. But if uke begins to twist out and stand up, let the neck hand follow through and quickly grasp their opposite collar and strangle ... with uke in a leant-back standing position ... by maintaining hold of the throwing arm in a straight arm lock. Or, as uke begins to resist the standard technique, tori might change to irimi-nage or tenchi-nage. Kaiten-nage can also be performed after any of the immobilisation techniques. It is also useful as a counter to a rugby style head first grabbing attack - move to the rear (left) corner, taisabaki slightly, and press the head down as uke approaches. If uke does not fly with their own momentum, twist one's own body making taisabaki in the opposite direction and sit them down backwards.
|
| Kaiten-nage |
|
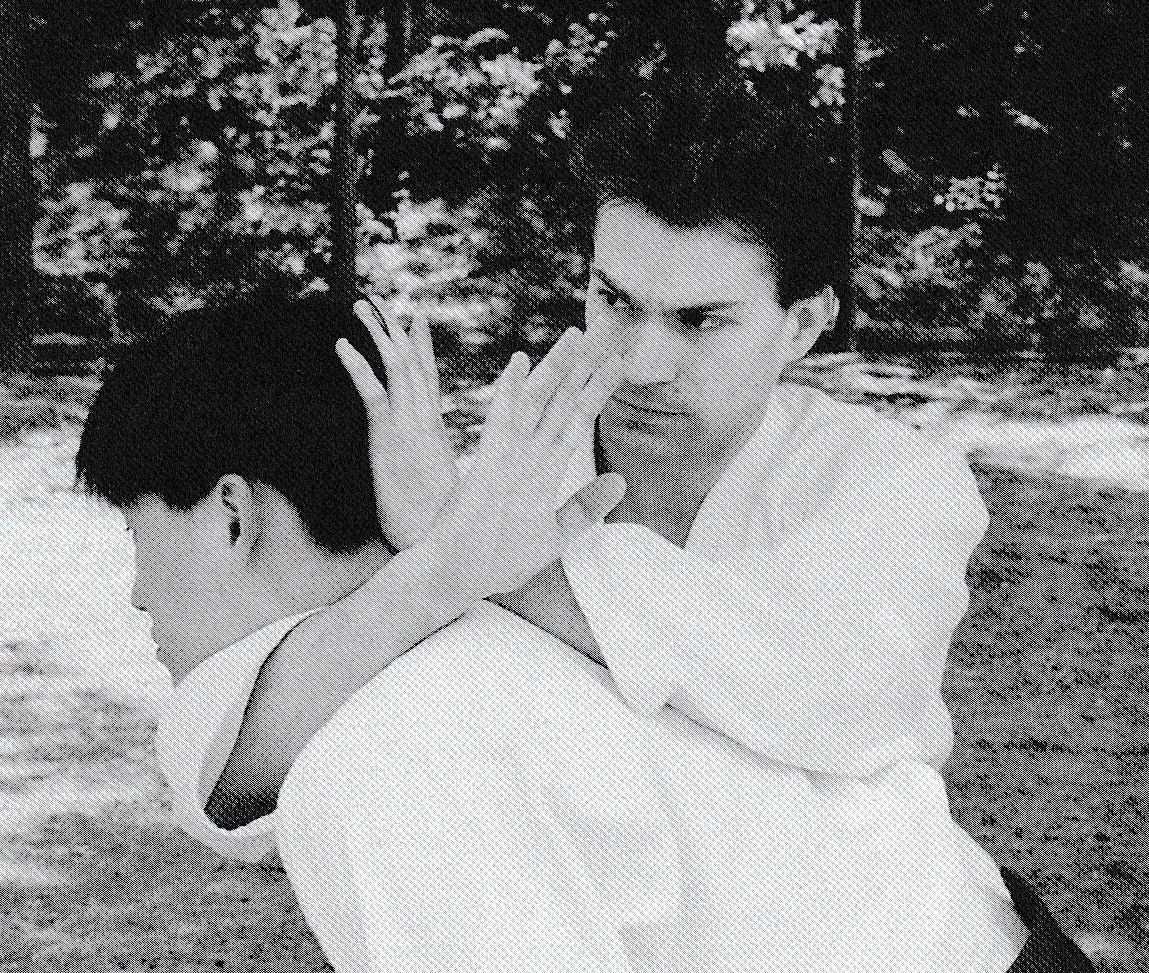
(n) Tenchi-nage is sometimes known as the zigzag throw, referring to footwork, or the heaven and earth throw, referring to the position of the hands. For ryote-dori most people zigzag with their feet, but there appear to be several interesting variations in terms of hand-work. In the simplest mechanical version, the hands follow the feet; left hand goes down as the left foot zigs, the right hand goes up as the right foot zags behind uke. In most cases, the top hand actually goes down too, as in irimi-nage. Some people however, insist on keeping it up high and making the throw work more with the body entrance; a little harder, but more enlightening considering the name of the throw. By far the best way is to initiate the lower hand as in tenkan-ho, with the upper hand cutting up inside uke's wrist. Important here is that initial tenkan-ho principle - it contacts uke's centre and off-balances, turns circularly, and can lead them anywhere, no matter how hard they grip. In this sense, this technique can be done in much the same way as suwari-waza kokyu-ho. An interesting variation is to place the upper hand on the near side of uke's neck, pushing up with tegatana to throw. To make a stronger throw here, one can also grab the cloth of uke's lower arm, or even contemplate Judo variations of an O soto-gari shape. By concentrating on the up and down motion of tenchi-nage, a variation of it can be done from ushiro ryote-dori; put weight in the left hand step slightly to the left. At the same time, raise the right hand high. A slight rearward step or shuffle should suffice to throw.
|
 |
| Tenchi-nage shape |
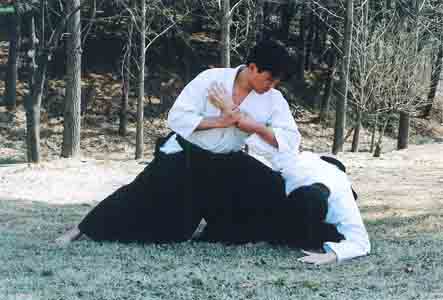
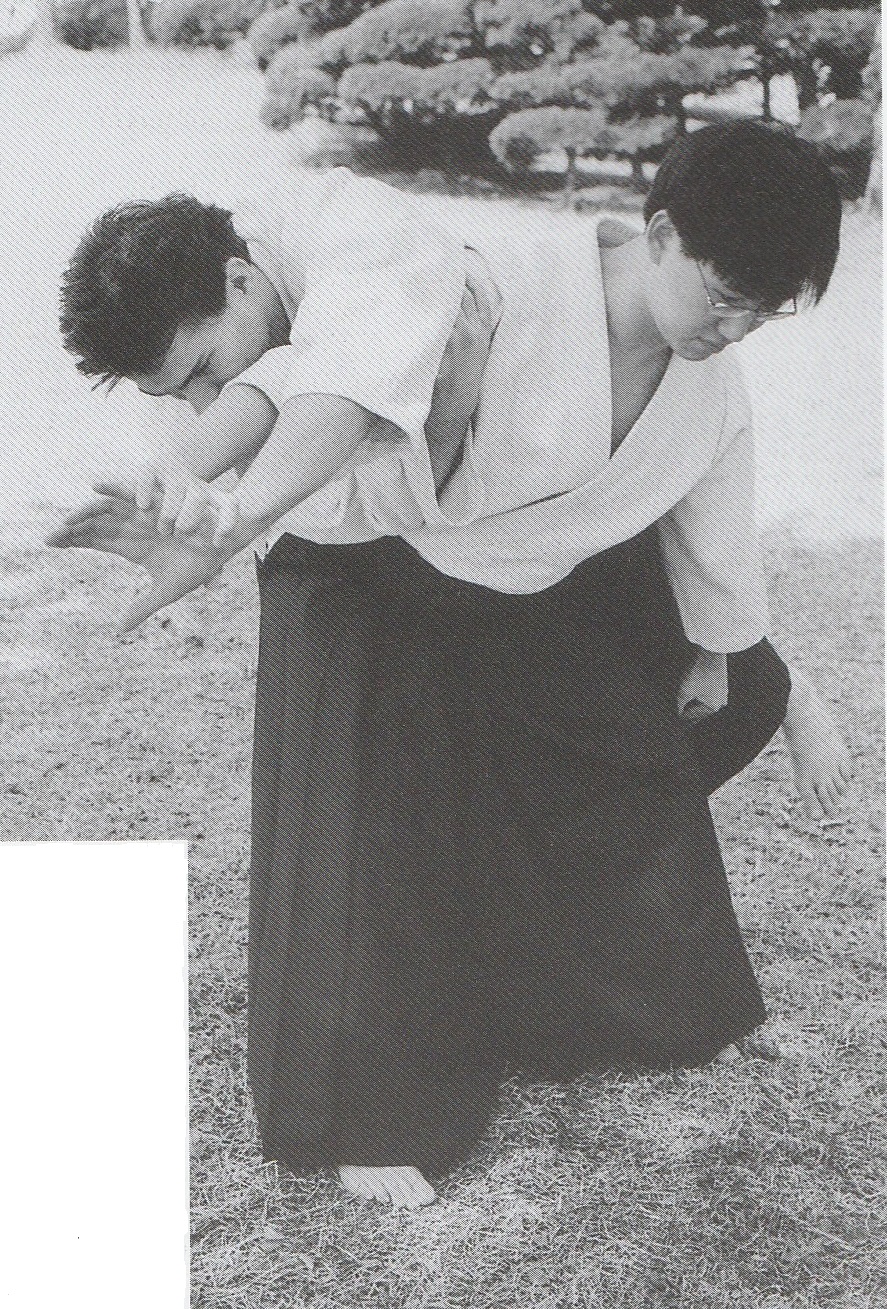
| Koshi-nage | Koshi-nage variation | |
 |
 |
|
|
(o) Koshi-nage, the technique that many love to hate, mostly because they cannot do it, otherwise because of the heavy break-fall. With a little thought, many techniques in Aikido can be converted to koshi-nage. The problem here is that hip throws are rarely practised enough in Aikido. Worse, lots of practice in 180 degree taisabaki means that many turn in too far to effect a good throw. The Judo hip throw, O-goshi, is qualitatively different to that of Aikido's koshi-nage. Nevertheless, practising the Judo type in an aiki manner will help one's throws enormously, the main difference being that in Judo, for extra power they straighten their legs, effectively doing the technique 'on' their opponents, jacking uke up and over. In Aikido, a committed attack necessitates that one move out of the way, so the throw is more like tripping them up over one's hip. An Aikido type O-goshi grabbing the cloth to throw is a good addition to break-falling exercises after the warm-up and a useful introduction to the many koshi-nage variations often performed in unison with projections or powerful arm-locks.
|
||
 |
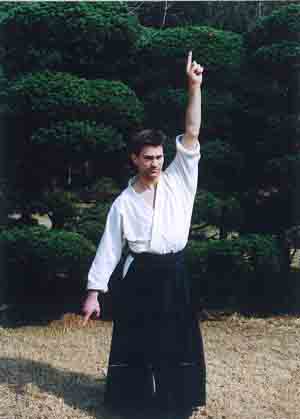
(p) Shomen-ate is a devastating Aikido technique, a strong upwards thrust to uke's chin with the palm-heel. It is not a hit - the trick is to thrust directly up, in line with uke's centre. Any deviation from the centre will result in one's own hand being automatically deflected left or right. The mild version sees uke taking gentle ushiro ukemi, the strong version sees uke's feet leave the ground. If uke has not already been sent flying, then a follow up with any number of techniques is in order before uke regains balance.
|
|
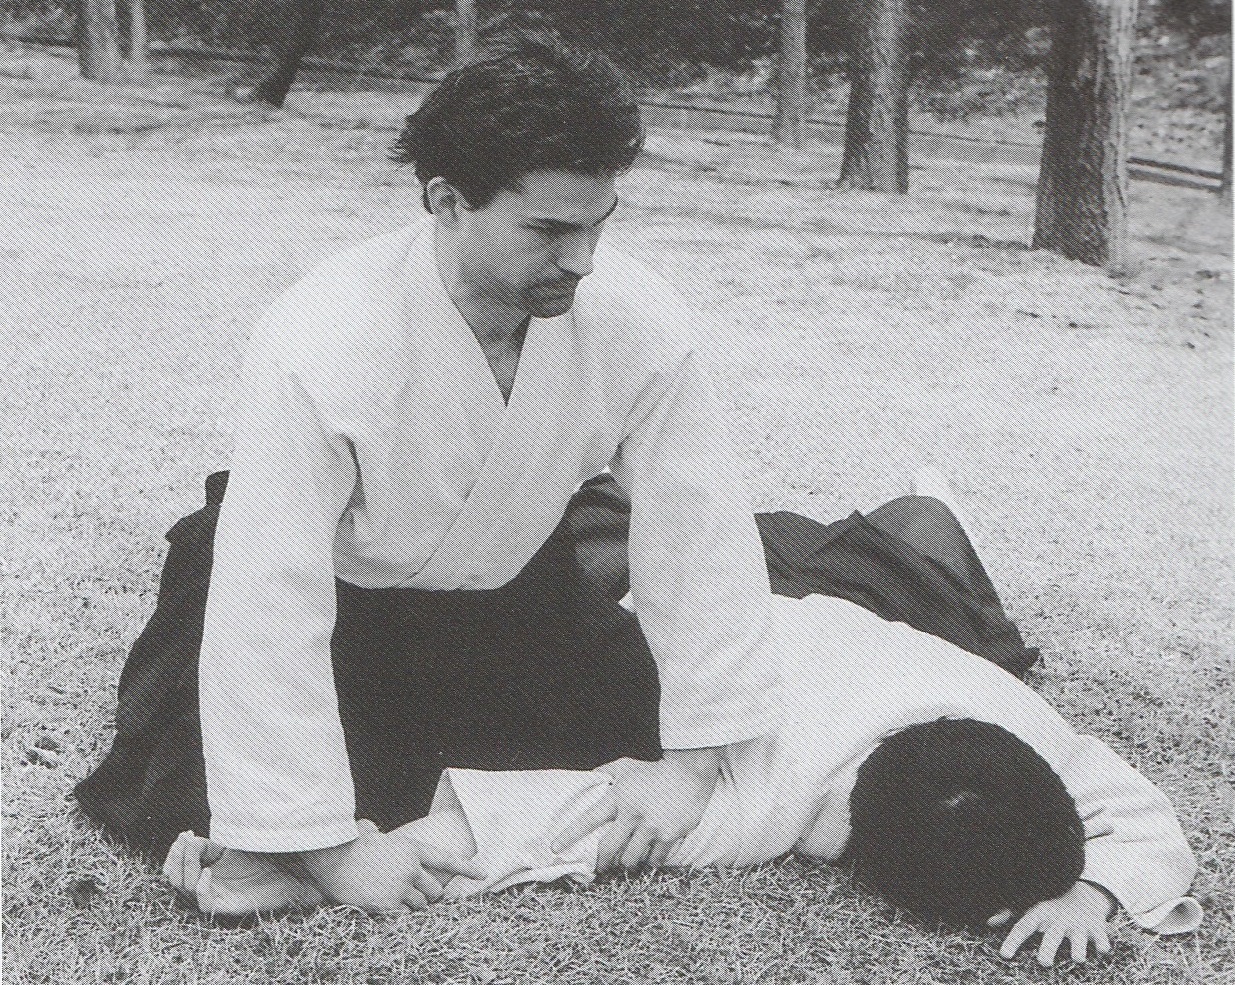
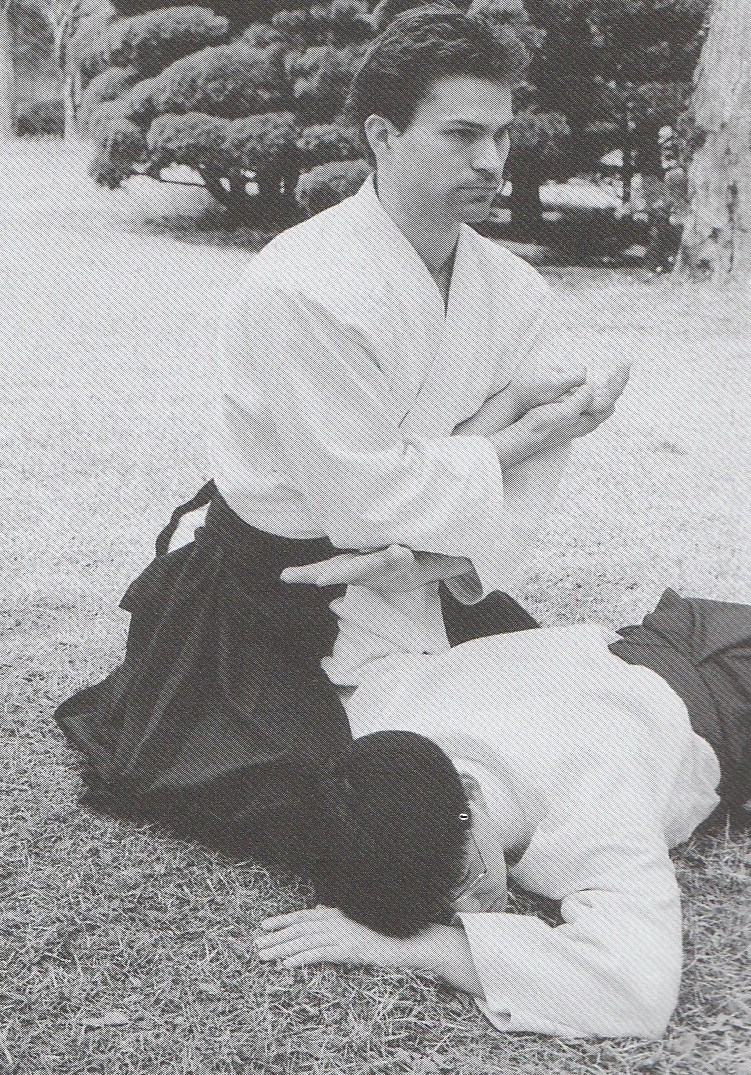
(q) Hold-downs at the end of techniques immobilise uke. Ikkyo, nikyo, sankyo, yonkyo, gokyo, and rokkyo each have their own forms. The standard finish for kote-gaeshi is generally the nikyo finish but there are several other variations. Shiho-nage is usually a projection but it also has it’s own hold-down form. Tenchi-nage and irimi-nage have no hold-down form and instead rely on zanshin to control uke. It is usual to let uke roll out of kaiten-nage thus this technique has no standard end form. There are many other hold-downs and variations beyond the basic forms and it is wise to learn as many as possible.
|
|
| Ikkyo | Nikkyo |
 |
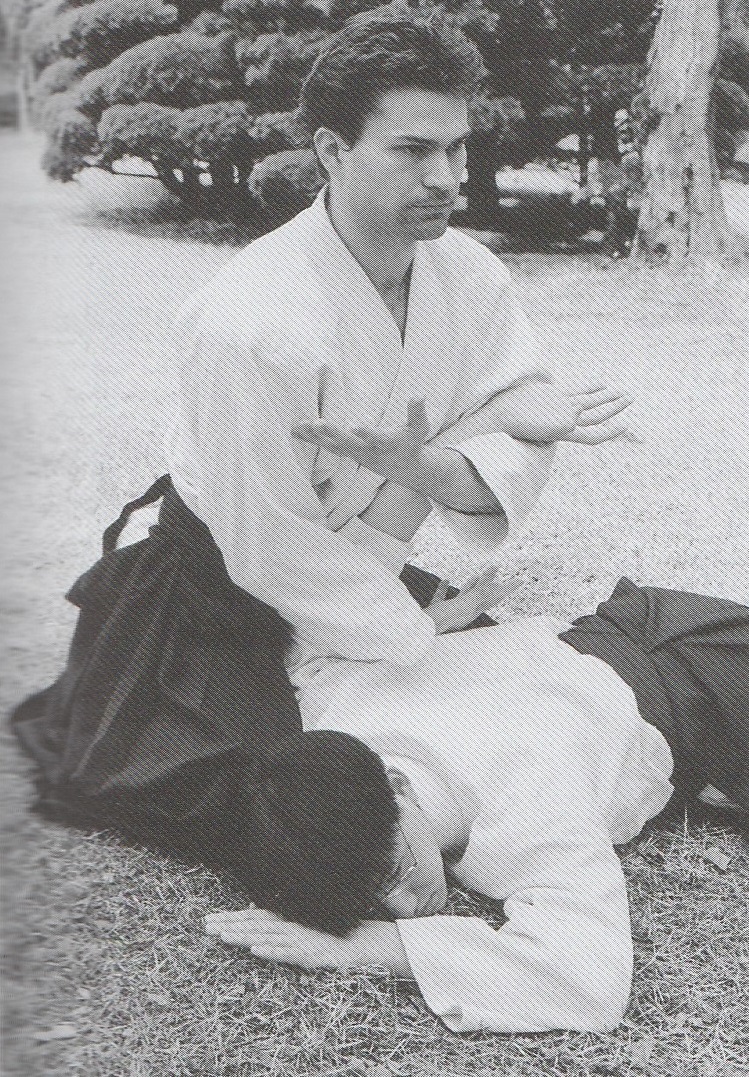 |
| Sankyo | Yonkyo |
 |
 |
| Gokyo | Rokyo (Waki-gatame) |
 |
 |
| Variation 1 | Variation 2 |
 |
 |
| Variation 3 | Variation 4 |
 |
 |
| Variation 5 | |
 |
There are many more variations. |
| Udekime-nage | |
|
(r) Other techniques There are several other Aikido techniques such as ude kime-nage, sumi-otoshi, juji-nage, hiki-otoshi, sukui-nage, and so on. Some schools incorporate more armlocks, others have more hip and shoulder throws, and a few even include trips, sweeps (of foot), and reaps (of thigh). Yet other schools include punches and kicks. Obviously, the more that is included the more it begins to resemble Jujutsu. But just what is it that defines Aikido? Most Aikido schools restrict themselves to a fairly limited number of techniques. Some speak of techniques that do not match their philosophy, others believe that their own school’s syllabus represents the totality of Aikido claiming it to be a complete system, and so on and so forth. What defines a particular brand of Aikido lies in the principles they use. Each teacher absorbs a slightly different set of principles based on their learning experience and ultimately such become reflected in their style or individual teaching method.
|
 |
| Sumi-otoshi | Juji-nage |
 |
 |
| Hiki-otoshi | Wrist-hold |
 |
 |
|
(s) Technical progress chart In many schools of Aikido, beginners are often bamboozled by the seemingly random multitude of techniques. In the early days of Aikido in Europe people adopted a system of first form = ai-hanmi katate-dori, second form = gyaku-hanmi katate-dori, and so on. For the first grading, a student would typically have to demonstrate all the basic techniques, about ten of them, from a first form attack. For the second grading they had to do both first and second forms, and so on. Some schools still use this system and by the time students reach Shodan, the knowledge attained is more or less equivalent to that of the complicated looking Aikikai or Yoshinkan syllabi. What students can do to make sense of the mess, if that is how they see it, is to make a kind of Aikido multiplication table. Write the basic techniques at the top of the columns, and the attacks along the rows. If desired, one could divide each box into two or three to account for tachi-waza, hanmi-handachi-waza, and suwari-waza. As one learns, the chart is filled in and one can immediately see where the gaps are. If curious, one could try to work out unknowns using aiki principles with a co-operative uke. |
Technical progress chart.
| Ai-hanmi katate-dori | Gyaku-hanmi katate-dori | Sode-dori | Mune-dori | Shomen-uchi | Yokomen-uchi | Tsuki | Ushiro ryote-dori | |
| kokyu-irimi | ||||||||
| kokyu-tenkan | ||||||||
| ikkyo | ||||||||
| nikyo | ||||||||
| sankyo | ||||||||
| yonkyo | ||||||||
| gokyo | ||||||||
| irimi-nage | ||||||||
| shiho-nage | ||||||||
| kote-gaeshi | ||||||||
| kaiten-nage | ||||||||
| tenchi-nage |
|
Note: An improved method of memory retention is to base one's techniques on principles found in specific kokyu-nage for each attack. For example, choose one method of kokyu-nage to represent an irimi movement and then try to base the irimi versions of your techniques upon that movement. Try likewise for tenkan. |